Friday, 29 June 2012

Want Brighter, Whiter Teeth?

Have your pearly whites lost their luster because of dingy gray or yellow stains? Stained teeth can occur as we age, but some common foods, drinks, and even mouthwashes can stain teeth. Do-it-yourself remedies can help whiten teeth, and avoiding substances that stain teeth can stop further discoloration. Use these secrets to whiter teeth to restore your bright smile.

Home Remedies for whitening teeth:
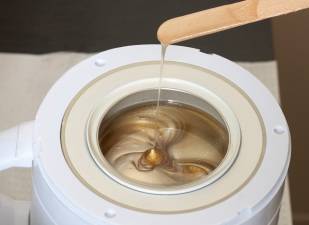
Make a paste by mixing
2 teaspoons of hydrogen peroxide
2 teaspoons of baking soda.


Place the mixture in a small bowl. The thickness of the paste should be consistent as the typical thickness of toothpaste. For a beter taste, add a bit of mint or just a scoop of toothpaste can be combined with the home-made paste for whitening teeth.

Now, how is this home-made whitening theeth remedy re used?

Apply with a toothbrush and leave the mixture on your teeth for at a couple of minutes. You should avoid swallowing the paste. If this happens, just drink lots of water. Use only once or twice a week.

Home Remedies for whitening teeth #1: Brush my teeth really with regular tooth paste. Then pour some extra virgin olive oil on a white wash cloth and scrub your teeth for incredible results

Home Remedies for whitening teeth #2: Make a paste of few drops of lemon juice and a pinch of common baking soda. Apply this to your teeth and massage gently as if brushing. This helps to remove the stain from the teeth.

Home Remedies for whitening teeth #3: Rub your teeth with the inside of orange peels. Orange peels have a mild compound that has been shown to whiten teeth which removes stains from teeth without damaging the enamel.

IMPORTANT: While hydrogen peroxide is safe to gargle and to use as a home remedy to whitening teeth, one should be extra careful not to swallow any of it as it poses a health hazard to the body. For pregnant or lactating women, any accidental swallowing of the whitening gel could be potentially harmful to the unborn fetus.

When using hydrogen peroxide, you may also experience gum irritation. This is perfectly normal and natural however you should avoid using it if you have any sores inside your mouth.

Thursday, 21 June 2012

Waxing Kits for At-Home Hair Removal
Using a waxing kit at home to remove hair from arms, legs, bikini area, chest and face can save you time and money. Waxing takes more preparation time than shaving, but the results usually last two weeks. To perfect waxing at home takes practice and patience. The pain lessens as you wax more and the hair follicles decrease in sizeAt-home waxing kits can be very effective at removing hair, and are a great alternative to shaving; however, the waxing process itself can be rather “annoying” for many people.  If you plan on doing large areas of the body, you can count on making several trips to the microwave to re-warm the wax, so you better clear your schedule for at least an hour because this method of hair removal is definitely high maintenance.
Waxing Instructions
Most beauty supply stores will have everything you need to start waxing from home—The waxing kit, strips of cotton or cheese cloth, and moisturizing products for post-treatment.  If you want to treat smaller areas like the upper lip, a facial waxing kit usually includes a small spatula for even distribution of the wax that is melted in the microwave before application.For hot waxing treatments, the wax is applied directly to the skin in the direction of the hair growth.  A strip of cloth is then applied, smoothed down with the hand, and pulled from the skin in the opposite direction of the hair growth.  Cold wax treatments are applied in a similar way, but the strips are ready to use, pre-coated with wax or a sugaring substance, and are usually best for facial, underarm and bikini areas.
Popular At-Home Waxing Kits
White at-home waxing is still considerably cheaper than going to the salon, some waxing kits can be expensive and the price adds up over time.  So your choice will depend on the area you want to treat, and your budget.
Side Effects of Waxing at Home
· Pain (Don’t say we didn’t warn you!  Waxing can be painful depending on the type of product, the sensitivity level of the skin, and how well the user adheres to the instructions) 
· Irritation/Rash
· Redness/Swelling 
· Bruising 
· Broken Skin 
· Ingrown Hairs  
Instructions:
Step1: Exfoliate the skin about one or two days before you intend to wax at home. This will bring small hairs to the surface and ensure a slower re growth.
Step2: Grow or trim the hair to a quarter inch before opening the wax kit. Use a small pair of scissors to trim, making sure not to injure yourself. On the other hand, wait to wax if the hair isn't at least a quarter inch long.
Step3: Make sure the area is clean and dry. Use baby powder on the area to ensure dryness.
Step4: Heat the wax, if necessary, either on the stove in a pot full of water or in the microwave. Follow the kit manufacturer's recommendations carefully. Under or overheating can slow down or ruin the whole procedure.
Step5: Apply the wax to the desired area as directed. Common methods include a roll-on container or using a wooden or plastic spatula to spread the wax evenly over the skin. Put on a single muslin strip, following the direction of hair growth. Smooth a hand over the strip a few times, pushing in the direction of the growth.
Step6  Pull the strip (or the wax, if stripless) off in the opposite direction of the hair growth. Check the strip to make sure you're getting the roots of the hair.
Home Waxing Tips :
Once you have the wax applied to your skin, and the strip laid on top of it, rub firmly in the direction you applied the wax. This will help the wax adhere to the hairs. Don't wait too long though, or the wax will cool too much. Pull the skin below the area taut and tear the strip off in the opposite direction that you applied it. Do it quickly! Slow removal doesn't work and it prolongs the pain. Once you've removed the strip, apply pressure to the area immediately with your palms or fingers. This will help alleviate pain in the area. Apply the wax for your next section, trying not to overlap the previously waxed skin. Never wax the same area more than twice in one treatment.
Waxing Aftercare Tips
Use a moist, warm towel to get rid of any excess wax.
Avoid sun exposure to the treated areas for at least 48 hours, and always use sunscreen.
Avoid wearing tight fitting clothes/underwear that would rub or irritate the treated skin.
Always do a test patch first before fully treating your skin.  You never know how your skin will react to waxing and it’s better to be safe than sorry.
After 24 hours, exfoliate the skin to make sure wax or dead skin does not clog the pores, resulting in ingrown hairs.

Wednesday, 20 June 2012

5 Tips for Smoother Skin

It's a fact of life: Your skin ages just like the rest of you. It's constantly exposed to the elements, from the punishing sun and heat to the bitter cold and wind. It's impressive to know that it holds up as well as it does. Through the years, the largest organ in the human body weathers sunburns, acne, stretching, winter dryness and cracking, and many other damaging effects without much too complaint.
Your skin performs several crucial roles. It keeps your body temperature regulated; protects you from infection and injury; keeps moisture inside; and filters and remove impurities. But those duties exact a price on your skin, causing it to lose elasticity and become thin, dry and cracked. Wrinkles, blemishes and spots are frequent signs of aging skin.

But if you want smooth skin for as long as possible, there are things you can do now and throughout your life to make it happen. The key to remember is that making good health choices about your skin can keep it looking younger for a longer amount of time. That means not just being careful about your exposure to the elements, but also being careful about what you do to your body as a whole. By following 5 simple tips, you can have healthier, smoother skin.
5: Protect Yourself from the Sun
The sun causes the most damage to our skin, so protecting it when you're outside is a top priority. Skin cancer, age spots, wrinkles, freckles, and skin that's rough or dry are all symptoms of too much sun.
Staying out of the sun between 10 a.m. and 4 p.m., when the sun's rays are strongest, can help protect your skin from ultraviolet rays that do the most harm to your skin. If you do go out during that time, wear clothing that covers as much skin as possible, including wide-brimmed hats and full-length shirts and pants. When you do expose your skin to the sun, wearing a good sunscreen can protect you. Use sunscreen with a sun protection factor (SPF) of 15 or higher. If you're at the beach or exercising outside, make sure that it's water-resistant and sweat-proof, and that it'll protect you from a broad spectrum of radiation (both UVA and UVB rays). Reapply the sunscreen as needed.
4: Keep Your Skin Clean
If you want smooth skin, you'll need to have clean skin, too. Washing your face twice a day with warm water, a clean wash cloth and soap or a cleanser removes dirt and oils and keeps your skin healthy. Be gentle when cleaning your skin if you want it to stay smooth, though. Avoid strong, scouring soaps, and limit the time you spend in the bath or shower. Shave carefully using a lubricating gel or foam, and pat dry with a towel after cleaning instead of wiping -- this will keep some moisture on your skin.
3: Moisturize
Your skin is made of three different layers: the epidermis, or the outermost layer of your skin; the dermis, the middle layer that contains blood vessels, nerve endings, and oil and sweat glands; and the hypodermis, which is mostly made of fat and contains your hair follicles. Moisturizers help that top layer retain moisture -- and this keeps skin smooth, too. The best time to apply a moisturizer is right after you step out of the shower or bath. With your skin still damp, apply the moisturizer so your skin will keep that moisture in. You can also apply after you wash your hands and before going outdoors for extended periods in cold weather.
2: Maintain a Proper Diet
You are what you eat, and that goes for your skin, too. If you want smooth skin, there are certain foods to consider and certain foods to avoid. Foods rich in Vitamin A, Vitamin B1, Vitamin B6, Vitamin C and Vitamin D help keep skin smooth and healthy. Vitamins A and C are particularly helpful if you want smoother skin. They can also prevent spots and other growths from coming later in life.
A good diet rich in omega-3 fatty acids from fish and antioxidants and vitamins from tea, fruits and vegetables may help preserve smooth skin and protect it from disease. But a good diet for smooth skin would be incomplete without the most essential ingredient -- water. The human body is made up mostly of water, and keeping it properly hydrated is essential to preserving good skin.
1: Healthy Living
Keeping your weight in check can give you smooth and healthy skin. Exercise, combined with a good diet, will do wonders for one of your most important organs. Exercise increases your circulation, delivering more nutrients to the skin and the rest of your body while carrying away toxins. It also helps the body produce collagen, which minimizes wrinkles
If you smoke or drink too much alcohol, chances are you're harming your skin. Smokers have more wrinkles around their eyes and mouths, and tobacco can cause the skin to turn a yellow or brown color.

Monday, 18 June 2012

Anti Aging Tips:

Surely nobody wants to grow old. So I am going to share a few tips here on how to slow the aging process.


1. Selenium: Selenium is a trace mineral that promotes body defenses. Selenium can be found in Brazilian nuts in large quantities. Eating 1 or 2 Brazilian nuts daily will help slow the aging process.

2. Eat less and chew more: Eat a smaller amount of food, but make sure what you choose to eat has the daily recommended vitamins and minerals. Also, make sure you chew the food well. Nutritionists say that chewing food at least 20 times, reduces the number of calories that we give our body.

3. Exercise: The same as always, eat healthy and exercise. We hear this over and over but we do not put it to practice. Exercise not only helps to keep fit, but also to maintain flexibility.

4. Multivitamins, vitamin E, calcium: This is a mixture of three little pills that could help you keep young for a long time.

5. Magical teas of eternal youth: Sage tea and damiana tea. Be careful with damiana tea, though. It also helps fertility. So, if you are not planning on becoming pregnant but want to drink the tea, make sure you are using a safe birth control method.

Saturday, 16 June 2012

How To Fix Split Ends Without Cutting Them

There's no hair enemy as fierce and unyielding as the much-dreaded split end. "Split ends occur when the protective outer layer of the hair cuticle wears away because of external stressors such as heat styling and salon chemical services," explains Amy Abramite, creative director and stylist at Chicago's Maxine Salon. "Once the internal structure of the hair is exposed, it becomes weakened, dehydrated and damaged, causing split ends." 

While the only true way to rid yourself of roughed ends is to have them snipped off, you can do between salon appointments to improve the look of damage and prevent more splits from occurring.
Use a wide-tooth comb: After you apply conditioner in the shower, slowly run a wide-tooth comb through hair until all the tangles are out. This prevents the snaps and breakage you can incur when you try to brush out hair that is roughed up from a towel-dry.
Mind your heat tools: That bargain-bin blow-dryer may be a tempting purchase, but inexpensive tools tend to dangerously overheat over time and burn ends into splits.
Go gentle: "Imagine wearing a silk blouse every single day. It would get pretty beat up. Treat your hair like an expensive fabric, and it will last longer and look better," .Use only covered elastics with no metal piece, like those made by Goody to tie hair into a ponytail. If looking for a sleek look, rely on products like gel and finishing spray to create a smooth finish, instead of pulling hair too tightly to achieve it alone.
Try on ponytails!
Take folic acid and biotin: There's a reason they say you are what you eat: Nutrients literally build the proteins that make up your hair strands. Two B vitamins in particular -- folic acid and biotin -- have been shown to supplement hair health, length and thickness, says Sunshine.
Folic acid helps the production of red blood cells, which powers the growth of hair. Foods rich in folic acid include green leafy veggies, oranges, soybeans and wheat. Biotin strengthens both hair and nails through its metabolism of fats, carbs and proteins. Brown rice, lentils, peas, sunflower seeds, walnuts and soybeans are all rich in biotin.
Use leave-in conditioner: Conditioners that you rinse out in the shower will do little to nothing for split ends, but a leave-in conditioner will add extra protection that stays on strands as you heat-style and go about your day.
Blow-dry the right way: Always use a nozzle on your dryer to control and direct the flow of air, and dry hair in a downward direction before sectioning off and drying completely with a round brush. This way, you spend far less time with intense heat straight on the hair. "If possible, air drying 90 percent before picking up the blow-dryer is even better," says Sunshine. And of course, if you can naturally dry all the way, that's always your best option.
Limit damaging services: There's unfortunately no way around it -- treatments like hair color, highlights, straightening and perms all cause trauma that can result in a bevy of split ends. Try to limit service to just one major hair concern, and refrain from washing strands for at least 48 hours afterward, when they're most porous and likely to break and split. Not only will hair health improve after you go on a chemical-service diet, but your wallet will thank you.
Get regular cuts: While a haircut is the only way to get rid of split ends, regular trims are your best protection against them. The longer you wait to trim, the greater chance you have of split ends worsening and travelling up the shaft. It may sound counter-intuitive, but this is why it's actually best to get frequent trims if you're trying to grow longer, healthier hair. Whatever your hair type or style, our experts recommend you get a cut or trim at least every six to eight weeks.

Friday, 15 June 2012

How to make Lips Pink & Soft

Dark and dry lips are a result of your lips not being moisturized and exfoliated as well as a suffering from bad circulation. Remedying this situation requires that you start exfoliating, moisturizing, and massaging your lips. It also helps if you quit smoking, if you are a smoker, and also get some exercise. Exercising just to get normal colour lips may sound odd, but it does contribute in the long run. Improving your diet is also important as, sometimes, rapid increases and decreases in weight cause the skin to be pulled in ward causing a dark appearance. In addition, an improper water intake causes toxins to build up in the skin an since the skin of the lips are transparent, it can really show.

The first part of the treatment starts with exfoliating. This is a simple technique of rubbing the skin off your lips; however, this should be done carefully otherwise you could end up with a sore lip. Normal skin is also exfoliated using mostly the same technique. All you need is some lemon juice or half a lemon rubbed over your lip. You could also use salicylic acid for this purpose, which would actually be more effective for this purpose. Once you finish rubbing the lemon or the salicylic acid on your lip, wait a moment before you start the next step – rubbing. The exfoliation terminology for rubbing is actually abrasion and on normal skin, this would be done in a cosmetic formulation using micro beads but the lips are a very sensitive part of the skin and cannot be subject to the same forces. Therefore, use your finger to do this task after tightening your lips a bit. This should be done every day.

Next comes moisturizing. Naturally, there is a little bit of skin oil called sebum that is secreted on the lips but since we lick our lips very often, this comes right off. To moisturize your lips, use a lip balm – when you are outside the house and coco butter when you are in the house. In an emergency where your lips are drying out, you can also use some of the oil from the skin on your nose on your lips as well.

The final part of this puzzle is massaging the lips. This is easy and should be done every now and then. It basically requires you to put your lips together, then from the inside let your teeth put some pressure on the lips and just move it in and out and side to side. This improves the circulation in the area allowing for the tissues to be oxygenated and for the toxins to be removed.

Thursday, 14 June 2012

Best Pedicure Tips Ever

Begin by completely removing any residual nail polish from your last pedicure.

Soak your feet prior to exfoliating and trimming your toenails to soften the skin and enamel. Add a little milk to the water so that its lactic acid can loosen any dead skin. 5 minutes is usually a good rule of thumb for how long to soak your feet, but the more cracked and callused your feet are the longer they will need to soak.


Use pumice to gentle smooth away calluses and rough skin patches. We recommend the Personal Pumice Bar because it is gentler on sensitive feet than a pumice stone or steel callus file.

After exfoliating, dry feet thoroughly, including between the toes.

Apply moisturizing foot cream being careful not to put moisturizer between your toes or you run a greater risk of getting a fungal infection such as athlete’s foot.

Cut nails straight across just above the skin to prevent ingrown toenails. Never clip the sides of your toenail and make sure your toenails don’t extend beyond your toes.

When rounding sharp nail edges file lightly in one direction being careful not to scrape the nail’s surface. Use an emery board rather than a steel nail file. A steel file is more likely to rip your nails.
The fine-grade surface of the emery board is for smoothing sharp or rough nail edges. This is the side you should use on your toenails. The coarser surface of an emery board on the reverse side is for shortening & shaping fingernails which can safely be kept longer than toenails.
Apply cuticle remover to the base of each nail & rub it in. Leave on for a minute.
Use a wooden or rubber cuticle stick (often called an orange stick) to gently push back the cuticles. A properly designed cuticle stick should be relatively small with rounded ends and a flattened tip.
When pushing back the cuticles, hold the stick at angle to prevent jabbing motions and use slow, gentle pressure. Be careful to remove skin only on top of the nail. Do not touch the toe flesh. Pushing back your cuticles should not be painful and should not bleed. If it hurts you’re pushing them back too hard.
While there are cosmetic benefits to trimming your cuticles, there is much debate among medical professionals as to the degree to which it increases your risk of infection. If you do plan to trim your cuticles use a sterilized, cuticle nipper. Don’t trim all the way down to the skin or you’re likely to bleed and feel a burning sensation.
If you have never trimmed your cuticles before it is probably a good idea to have a professional pedicurist show you how to do it the first time. If you have a foot condition, ask your doctor before trimming back your cuticles.
Don’t apply colour toenail polish to conceal toenail fungus as it will only protect the infecting bacteria causing the infection to last longer. Apply a coat of clear antimicrobial nail polish instead.
Prior to polishing remove any traces of cuticle remover from the nails by applying a non-acetone polish remover.
Roll your nail polish bottle between your hands rather than shaking it to avoid air bubbles.
When applying nail polish keep away from fans, air conditioners, and drafts which can also cause bubbling.
When applying nail polish use the three stroke method. One stroke on either side with the final stroke in the middle. Try not to paint the cuticle.
If you accidentally paint your cuticle or skin you can remove the blemish with a Q-tip dipped in nail polish remover.
If you don’t wish to colour your nails apply a clear coat of polish or use a nail buffer to remove surface enamel imperfections.
Moisturize your feet regularly; not just when you give yourself a pedicure. A recent AMPA survey revealed that only 41 percent of women moisturize their feet frequently even though it’s the easiest way to prevent cracked heels and peeling skin.

Tuesday, 12 June 2012

Fashion Emergency..!!

Ever been caught in public with a bra strap that won't stay up, mascara that won't stay on your lashes, or a major run in your pantyhose? Well, there's no need to run and hide in the nearest bathroom. A few simple tricks will either ameliorate or keep these fashion emergencies at bay and let you go on your way with confidence.


 1. For pantyhose or stockings that decide to make a "run for it" add a dab of clear nail polish at the tip of the run and that'll do the trick to stop it in its tracks. If you don't have nail polish handy, a quick spray of hairspray works just as well. If the run is just too obvious then ditch the things and go bare. Always remember to shave and moisturize just in case!

 2. The zipper on your best sweater or jacket get stuck? No fear, just rub a bar of soap on the zipper and problem solved.

 3. For skirt and pant hems that come loose, double sided tape works wonders to keep things in place, as do band-aids when you are in a pinch.

 4. Lint balls or piling on your favorite sweater is no reason to toss it out. Rather than attempt to pick them all off, try using duct tape or masking tape wrapped around your hand. Gently swiping your hand across the fabric will lift off the lint and leave your sweater looking like new.

 5. Always keep baby or cosmetic wipes handy in your purse to wipe away excess blush or mascara raccoon eyes. It'll give you a mid-day refresher and save you from looking like you've been heavy sweating in your make-up.

 6. For loose buttons, try dabbing that ever useful clear nail polish over the top and it will keep the thread in place and your button as well. To fully avoid loose button fall-out, try reinforcing your buttons before an important event. That way you know your buttons will stay put and you'll be avoiding what could turn into a major fashion emergency.

 7. Hair getting frizzy right before your hot date and your frizz serum is safely at home? Try running some hand lotion through your hair. It'll soften your hands, condition your hair and flatten the frizz instantly.

 8. If you get caught with painfully dry hands and/or cuticles in public, rub some Chapstick over the dry/rough spots. Works like a charm to make your hands & cuticles look smooth and conditioned.

 9. Bra strap won't stay up? Double sided tape comes to the rescue once again. Just stick a tiny piece on your shoulder and lay your strap right over it. No one will be the wiser and your strap will be staying put.

 10. For sweater snags, rather than tug at the loose end, simply tuck it in and knot it on the inside. It's an easy way to keep your sweater and your ego from unravelling!

 With a few simple fashion and beauty emergency tips under your belt, you'll never have to worry about making a quick exit again!

Monday, 11 June 2012

Tips To Clean Your Expensive Jewellery

Cleaning : A regular professional cleaning is a good idea. Not only does it keep your jewellery looking its best, it also ensures that a trained professional takes a look at it at least once a year, allowing for the earliest possible detection of wear or damage. Between professional cleanings, however, there are some things you can do to keep your jewellery clean.


Diamonds: For diamonds, use a soft-bristled non-metallic brush and a mild ammonia and water solution. Gently scrub away any grime, especially around the prongs or setting where build-up is likely. Even a clean looking diamond often has a thin layer of skin oil and will shine better after a cleaning. Avoid touching the diamond as much as possible
Gemstones: Cleaning gemstones is easy. Simply soak the piece in a bowl of warm, soapy water for several minutes and then use a soft, non-metallic brush to remove any grime. If you use a jewelry cleanser, make sure it is non-abrasive. Don’t use harsh chemical cleaners, and don’t clean the item in the sink too often it ends up down the drainpipe. Also keep in mind that some gemstones may have been treated or enhanced by heating, oiling, irradiation or diffusion. Heated and irradiated stones generally don’t require special care when cleaning, but diffused stones could become lighter if scrubbed too hard. Also, the oil on an emerald can be stripped away by cleaning, making the emerald change appearance. If this happens, simply bring it to your jeweller for re-oiling.
Pearls: Pearls are beautiful. Unfortunately, the layers of nacre of which a pearl is made are very soft by jewellery standards and easily damaged. Since it is an organic compound, pearls also are easily dulled or even eaten away by chemicals and alcohol. Wash cultured pearls in very mild, soapy water and nothing else. It's also a good idea to bring your cultured pearls in for restringing every couple of years, especially if you wear them often.
Metals: For mountings, you can use rubbing alcohol to dissolve some of the stickier grime. However, don’t use alcohol on any kind of pearl jewellery. Soap and water and a soft brush will take care of most of your cleaning needs. Make sure the brush is VERY soft when used on metal, especially gold, which can be scratched relatively easily. Use a soft cloth that won’t leave fuzz or threads behind to dry and buff your jewellery once it's cleaned.
Ultrasonic Cleaners: Ultrasonic cleaners are machines that clean jewelry by bombarding them with sound waves. This vibration shakes off dirt, but the vibrations can also cause serious damage. The inclusions in gemstones, especially brittle stones like emeralds, can be greatly enlarged by the shaking, making the stones less attractive and even less valuable. Soft gems like pearls should never be put in an ultrasonic cleaner. Because of the risk, we recommend against using the ultrasonic cleaners now available to consumers unless your jeweler specifically says it won’t cause any damage.

Saturday, 9 June 2012

Summer Fashion with Bright Colors

Summer Fashion with Bright Colors: Bright colors are the best summer fashion theme in summer season and that’s why they are the summer essentials. They make you feel beautiful and live. This is the best season to show off your colors love and pull off a stylish look. So, get those green, yellow, teal, orange, peachy, minty and neon colors in this season.


Summer Nail Polish Fashion: Get bright or pastel nail colors like teal, yellow, orange, green, peach, purple etc. and don’t forget to get a nude color as it goes well in any season. If you’re bugged up sitting at home then this is the time to show your creativity use these colors and turn them into a beautiful nail art and enjoy your summer.

Summer Outfit: Add these colors to your wardrobe too and give yourself a fashionable and stylish look. Get neon colors like electric green, aqua, orange, yellow, neon pink clothing and add that splash of color to your wardrobe too and give yourself a new fashionable and beautiful look. Buy these colors the way you prefer.

Jeans:  If you’re planning to buy a jeans then go grab bright colors like neon pink- it will give you a prettier and girly look, orange- it will give you a bold and beautiful look, yellow- it will give a innocent beauty look, neon green- Personally speaking about this color I won’t dare to pick it up, if you’re like me go for sea-green, aqua-green colors as fluorescent green is not my cup of tea!!  . These greens can give you a hot look if experimented well with other colors you’re going to wear with them. Then, you will just rock!!

Summer Footwear: If you have any dull looking outfit and you are bored looking at it then go get those bright colored shoes and mix them up with your outfit and give yourself a trendy look. You can buy shoes according to your comfort like heels, wedges,pumps, sandals etc and use them as a fashion symbol for this summer.

Accessories Fashion: Summer handbags- Choose the colors wisely according to our outfit and different occasions. Clutches- Straw clutch is best for hot summer, Floral clutch in soft pastels or bold shades are best for a special night out, White clutch you can accessorize with any outfit , Headbands- Get colorful headbands or with bold flowery printed to pull your hair away from your face., Hats, Overly sized sunglasses which suits your face, Hair clips which comes in a variety of colors, styles and shapes, Umbrella that comes in beautiful styles and colors which looks cute yet stylish and is a great protectant against heat and whatever you would love to wear just don’t forget to give it that splash of summer colors.

Thursday, 7 June 2012

Quick Tips For Healthy Hair.

Now a days, not only women but men too are willing to pay any amount of money for finding out the secret behind healthy hair. Irrespective of the type of hair you are born with, follow these 5 tips and see the results yourself: healthy and luxurious hair.

1) Diet: Healthy hair beings with your body. Dark green vegetables such as spinach and broccoli are an excellent source of vitamin A and vitamin C which is needed to produce sebum, the body’s natural hair conditioner. Coconut is also considered as an excellent food for hair. Dairy products such as fresh yoghurts and milk not only strengthen your hair but also add shine to it. Avoid processed and canned foods as they are not really helpful in providing nutritionto your hair. If you maintain a healthy, balanced diet then there’s nothing that can stop you from achieving healthy, happy hair.

2) Hairbrush Usage : Brushing your hair before shampooing is essential as it stimulates the scalp and promotes blood flow. It also helps in removing scalp flakes and product buildup. Moreover, do not brush your hair when it’s wet as this causes unnecessary breakage and damages hair. Avoid using plastic, metal and nylon brushes as they attack and break the hair cuticle. Finally, brushing your hair regularly will keep it looking healthy and glossy.

3) Blow Drying: Avoid blow-drying your hair as it can make your hair brittle and cause split-ends. Squeeze the water out with a towel and let it dry naturally. If you must use a hair dryer then keep it at the lowest setting possible. Similarly, steer clear of hair straightners and curling irons.

4) Stress: Stress can have extremely adverse long-term effects on both the quality and the color of your hair. Learn to manage your time well and keep mental pressure at a minimum level. Practice meditation as it is an effective relaxation technique. And last but not the least, get adequate amount of peaceful sleep.

5) Oiling and conditioning: Treat your hair to deep conditioning once every twoweeks. They strengthen your hair and protect it against breakage as they penetrate the hair shaft. A warm oil scalp massage twice or thrice a week will also help to keep hair moisturized. Leave it on overnight, if not, then at least for an hour or two before shampooing your hair. Regular oiling and conditioning notonly result in lustrous, healthy hair but also help in preventing hair loss

Monday, 4 June 2012

How to Get Rid of Black Circles Under Your Eyes.

Get your beauty sleep. Get plenty of sleep nightly. It’s not entirely clear why inadequate sleep results in dark circles under the eyes, but lack of sleep tends to cause the skin to become paler (thus increasing the appearance of darkness under the eyes), and reduces circulation.

Eat well. Eat a healthy, balanced diet, take vitamins, and drink plenty of water.

Relax more. Relaxing might help remove sources of stress and anxiety that are preventing you from sleeping, eating and resting properly.

Slice cucumbers into thick slices. Cucumber slices have long been used to reduce puffiness and refresh the appearance of skin around the eyes, providing a fast "pick-me-up" for tired and puffy eyes. Place a slice over each eye, extending over the darkened area. Do this daily, coupled with lying down for 10-15 minutes. Keep your eyes closed.

Apply cool tea bags or an ice cube wrapped in soft cloth to your eyes daily. The tannin in tea bags reduces swelling and discoloration. Lie down, preferably in the morning, and leave the cool and damp caffeinated tea bags over your eyes for about 10-15 minutes. Keep your eyes closed. You can refrigerate them overnight so they will be ready in the morning.

Apply an eye cream containing vitamin K and retinol. Dark circles may be caused by a deficiency of vitamin K. Regardless of the cause, however, skin creams containing these two ingredients reduce puffiness and discoloration significantly in many people. Long-term daily use seems to have the greatest effect.